


How To Change a String On a Fender Stratocaster

Strings break when you least expect them to, don't they? When I played the guitar part in the pit orchestra for the Johnny Cash "Ring of Fire" Musical I broke not just one, but two, strings during the same performance of that guitar-prominent show. Thankfully I had prepared for such a scenario by having plenty of extra strings next to me. The scary part of that show was that the pit orchestra was on stage and it was an integral part of the musical. The audience could see almost every move I made. Fortunately, the actors were situated between the pit orchestra and the audience so I wasn't completely exposed. Nevertheless, I had to change strings efficiently - sometimes playing a tune or two with only five strings - and get back to full capacity quickly.
Take note of the actors, other pit orchestra members, and me in the picture above. (I'm the one playing the white Fender Stratocaster under the roof.) Can you see the sweat rolling down my face as I play a solo? There's not much so scary as trying to play while the audience AND the actors are watching your every move.
A few days ago a string broke on my Fender Strat in the middle of a lesson. As I was preparing to change it later, I thought it might be helpful to take pictures and write the following webpage article. I hope you find it helpful.
Follow These Steps To Change a String On a Fender Stratocaster
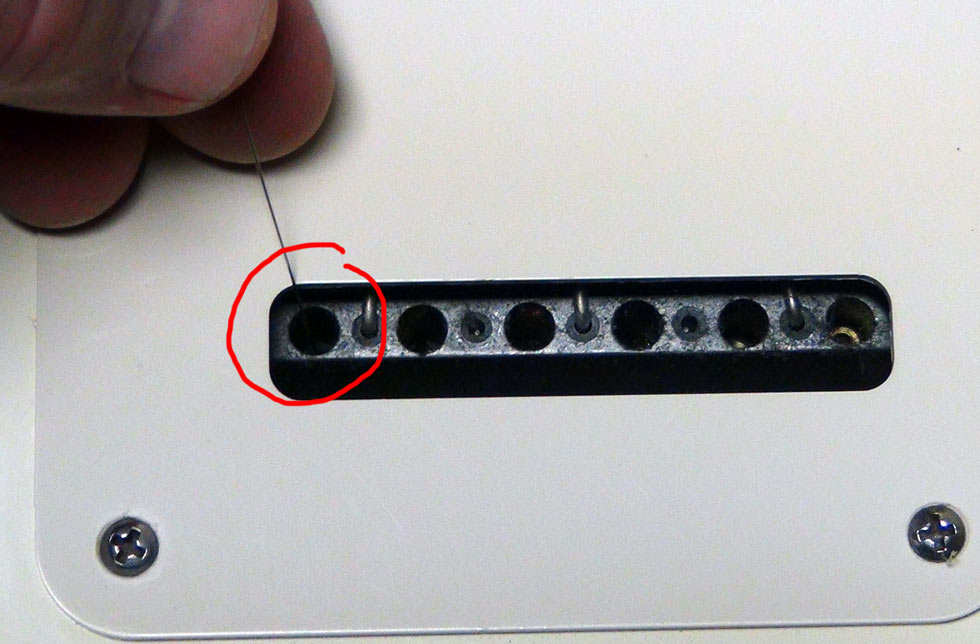
1. Remove any remnants of the old string. If you are changing a string because the old one broke, sometimes parts of the old string may remain on the tuning peg or in the hole where the ball end is inserted.
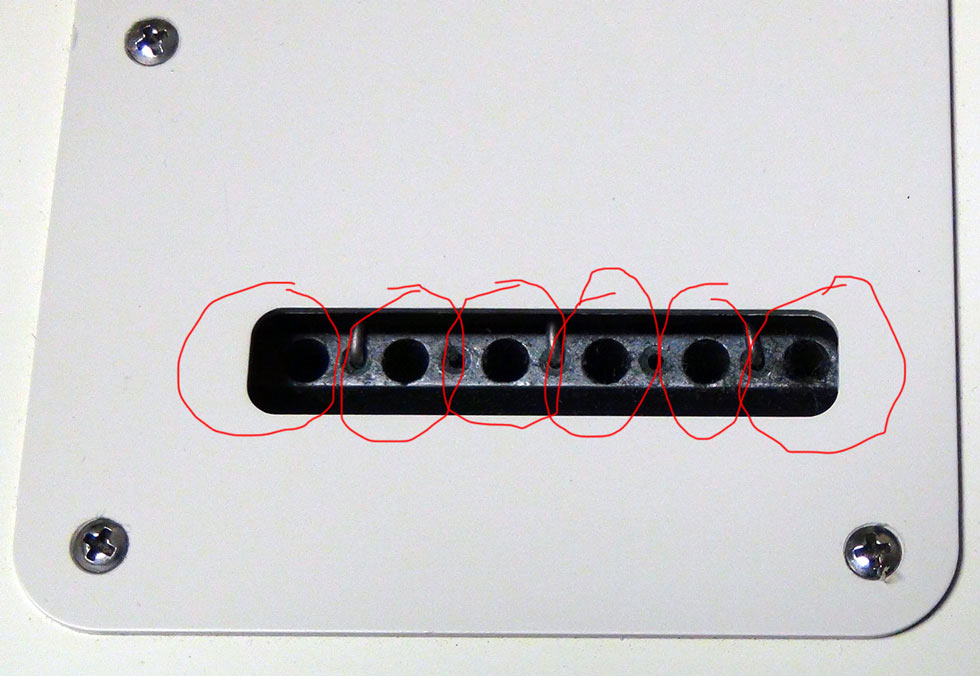
The back of a Fender Stratocaster where the ball ends are inserted
2. Insert the plain end of the string (not the ball end) into and through the hole accessed on the back.
3. Pull the string through the bridge on the front of the guitar. Make sure the string comes through the correct hole. FRUSTRATION ALERT!: Sometimes the string will have a mind of its own and try everything in its power to fudge things up. It might go through the wrong hole or get stuck against something. (Inanimate objects don't have brains so they're completely lost when it comes to things like this!) ;-) Just maintain your cool and use your willpower to force your will on the string.
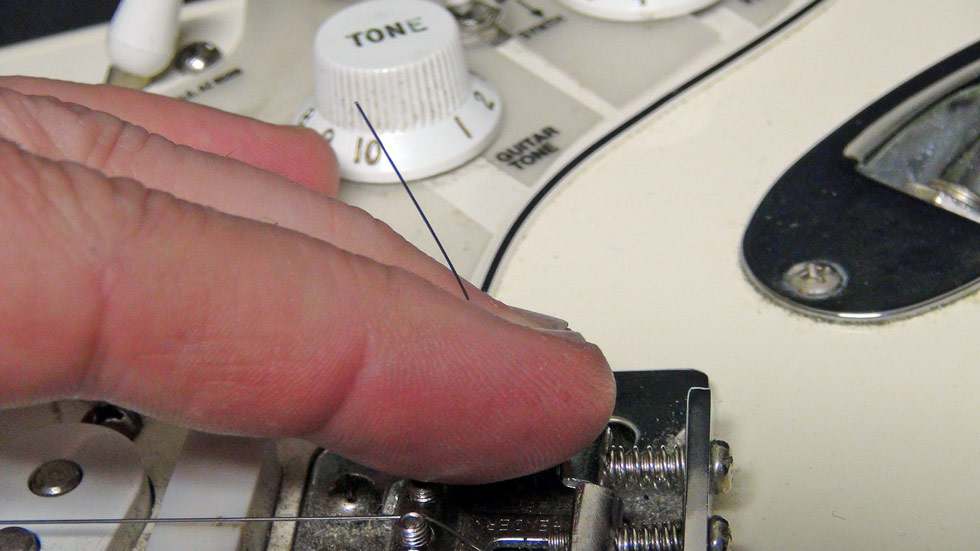
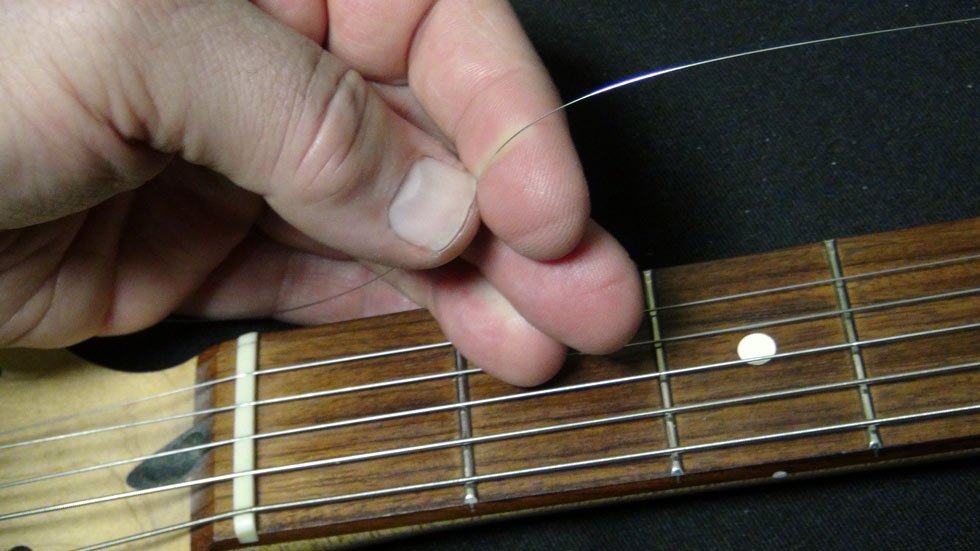
4. Pass the string through the slot on the nut and under the string guide. Make sure the string stays in place like this as you complete the rest of the steps. SECOND FRUSTRATION ALERT! It's frustrating to find out that - after you've completely installed the string and tuned it up - you forgot to keep the string in the nut slot or under the string guide.
5. Leave one to three fingers' worth of slack in the string - less for thicker strings. This will let you wrap enough string around the tuning peg to hold the string in place. But read below for a nifty trick that will hold the string in place even if you wrap only about one turn's worth of string around the tuning peg.
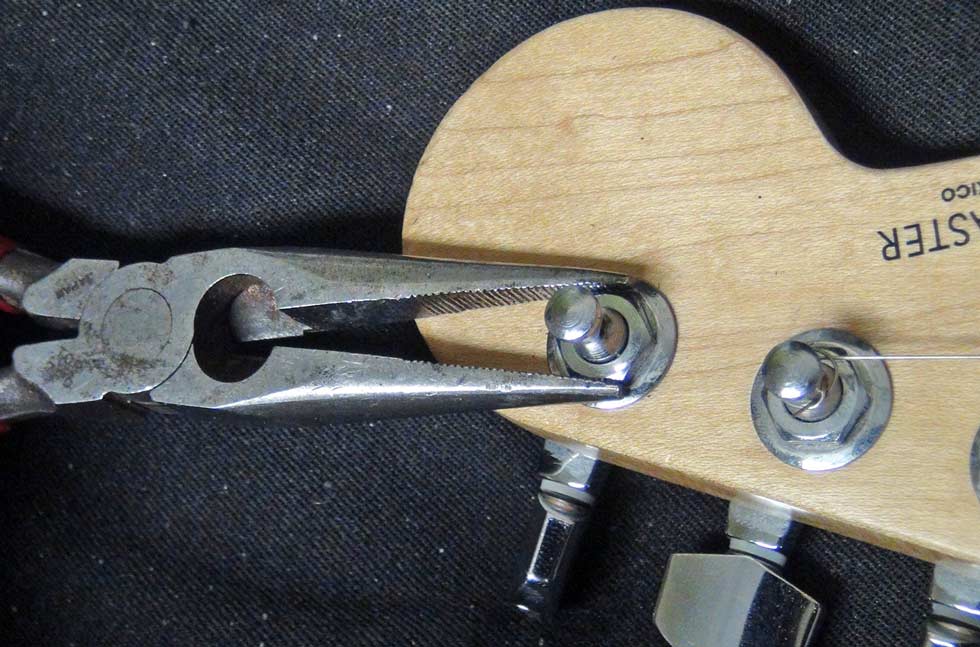
6. While you're at it, check the nut that keeps the tuning peg assembly firmly attached to your guitar to make sure it is snug. If it's loose, tighten it with a pair of pliers, or better yet, a wrench. (Be careful not to slip and end up gouging the finish of your beautiful guitar!) This nut tends to go slack over time. Remember, to a nut or screw, your guitar is a terrible place to work - nothing but constant vibration! They tend to go - well, pardon the pun - nuts and have a screw loose! ;-)
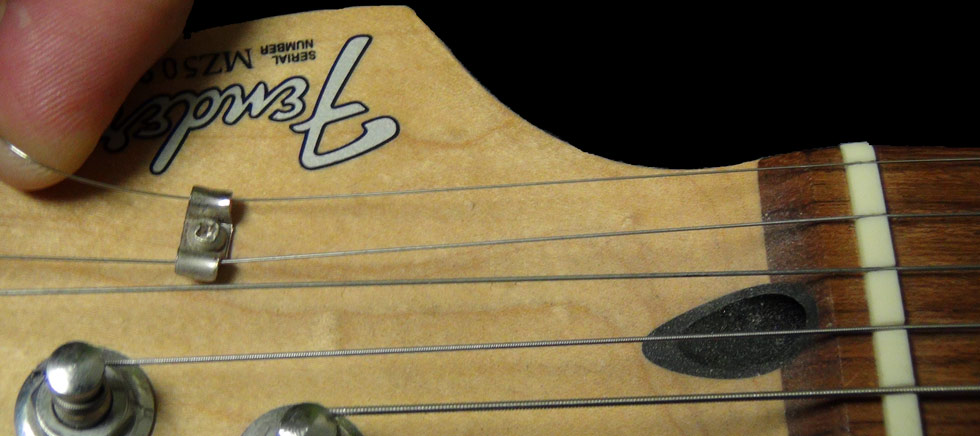
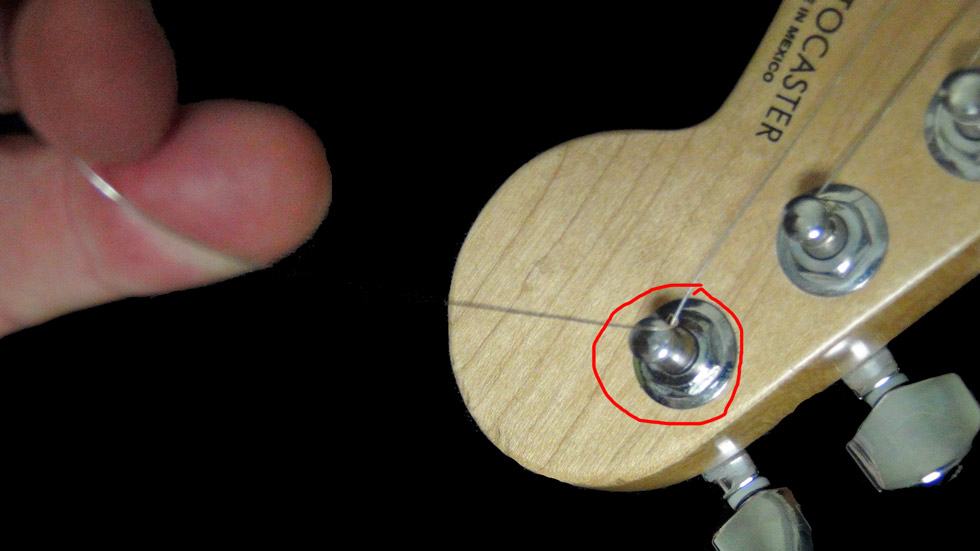
7. Pass the string through the hole in the tuning peg.
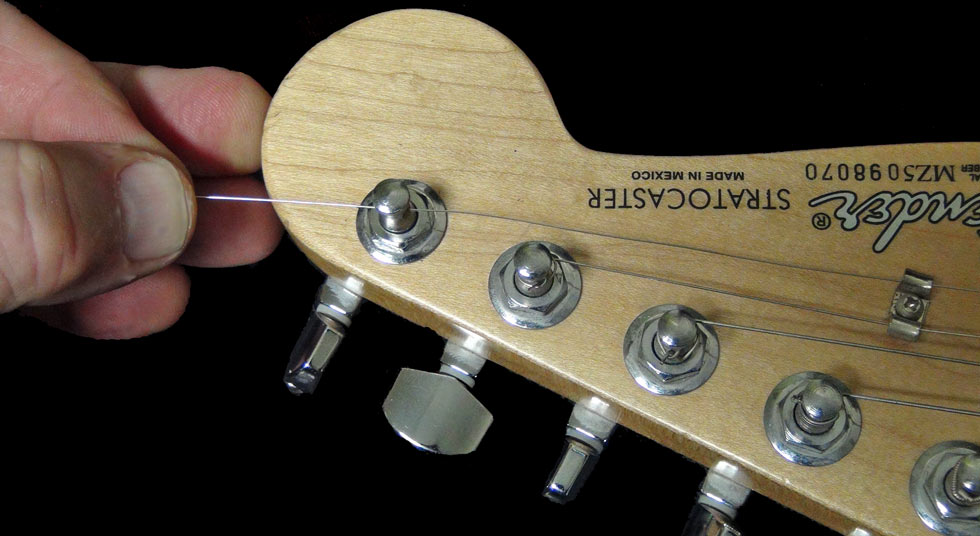
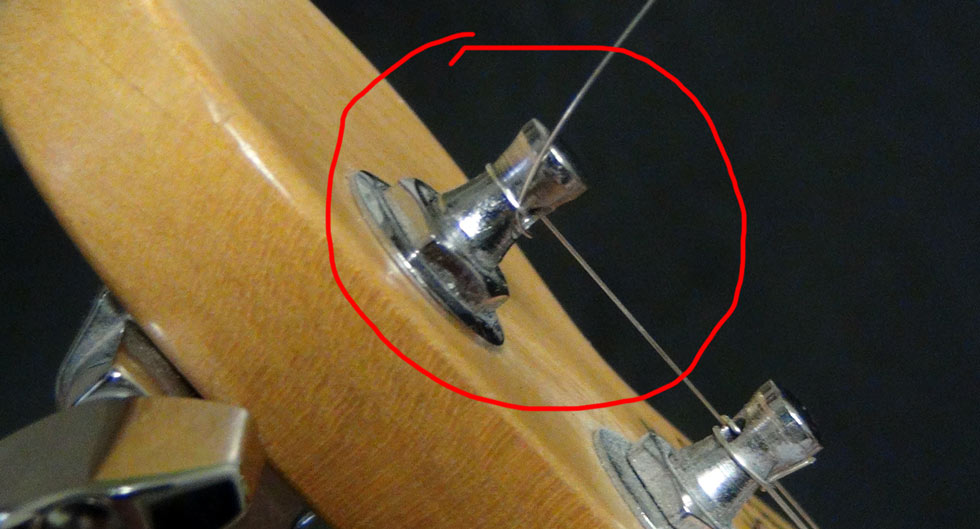
8. The next few steps are the cool part. Why? You'll be able to attach the string to the tuning peg so that it won't slip when you tighten it. Here's what you do: First, pass the end of the string under the part of the string that's on the other side of the tuning peg. Notice exactly how this is done in the photo below. NOTE: If you pass the string under itself from the wrong side of the guitar, this series of steps will not work.
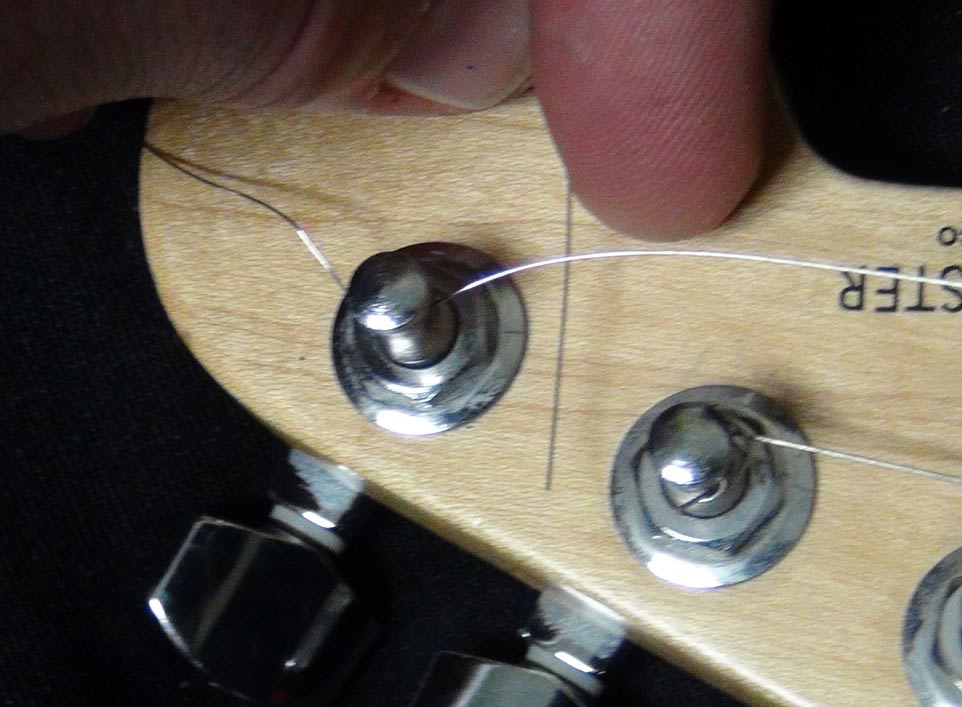
9. Now pull the string out and away from the guitar. Check out the picture below to see how this is accomplished. Then tighten the tuning peg and make sure the string is tightened in the same direction as the rest of the strings. As you do this, notice that the portion of the string that you are holding away from the guitar gets trapped between the tuning peg and itself. As long as you wind enough string around the tuning peg to trap the string in this way, it will not slip out as you tighten it. There is no need to pile turns and turns worth of string around the tuning peg. Check out the two pictures below.
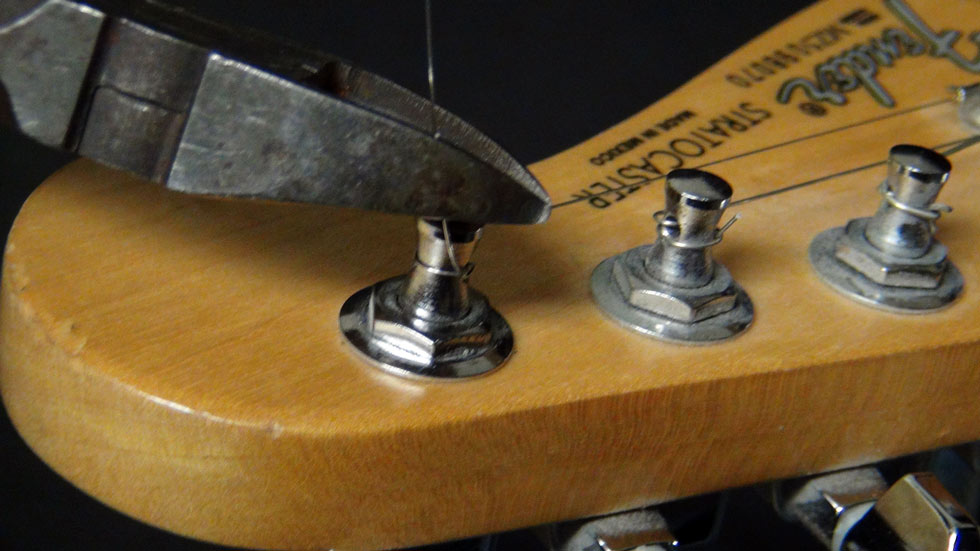
10. Once the string is tuned up to pitch, finish the job by cutting off the excess string with a pair of diagonal cutters. Voila! A perfect string-changing job!
If you have any questions, shoot me an email: jla@jlamusic.com
Jeff Anvinson, owner/operator of JLA Music
Website and most graphics are created inhouse by Jeff Anvinson, Owner/Operator of JLA Music
Some graphics are purchased from Can Stock Photo, used by permission, and are Copyright
© Can Stock Photo
JLA Music takes care not to infringe on anyone's rights. Please contact us at jla@jlamusic.com if you have questions.
Copyright 2023 © Jeffrey L Anvinson